OpenStudio Application Interface Guide
Overview
The tabs on the left that move vertically are ordered in a suggested workflow.
Above: Overview of the OpenStudio Application Interface.
Sub-tabs
Sub-tabs are designed to move from more general categories on the left to more specific on the right. On the Constructions tab, the sub-tabs are Construction Sets, Constructions, and Materials. If you are not building your own materials and constructions you may not need to go to the Materials sub-tab.
Right Panel
The right panel provides access to items in the library or in your Model, and allows you to edit some of these items.
-
"My Model" displays items that are part of your Model already.
-
"Library" includes components and measures that come with the application or are downloaded from the Building Component Library (BCL).
-
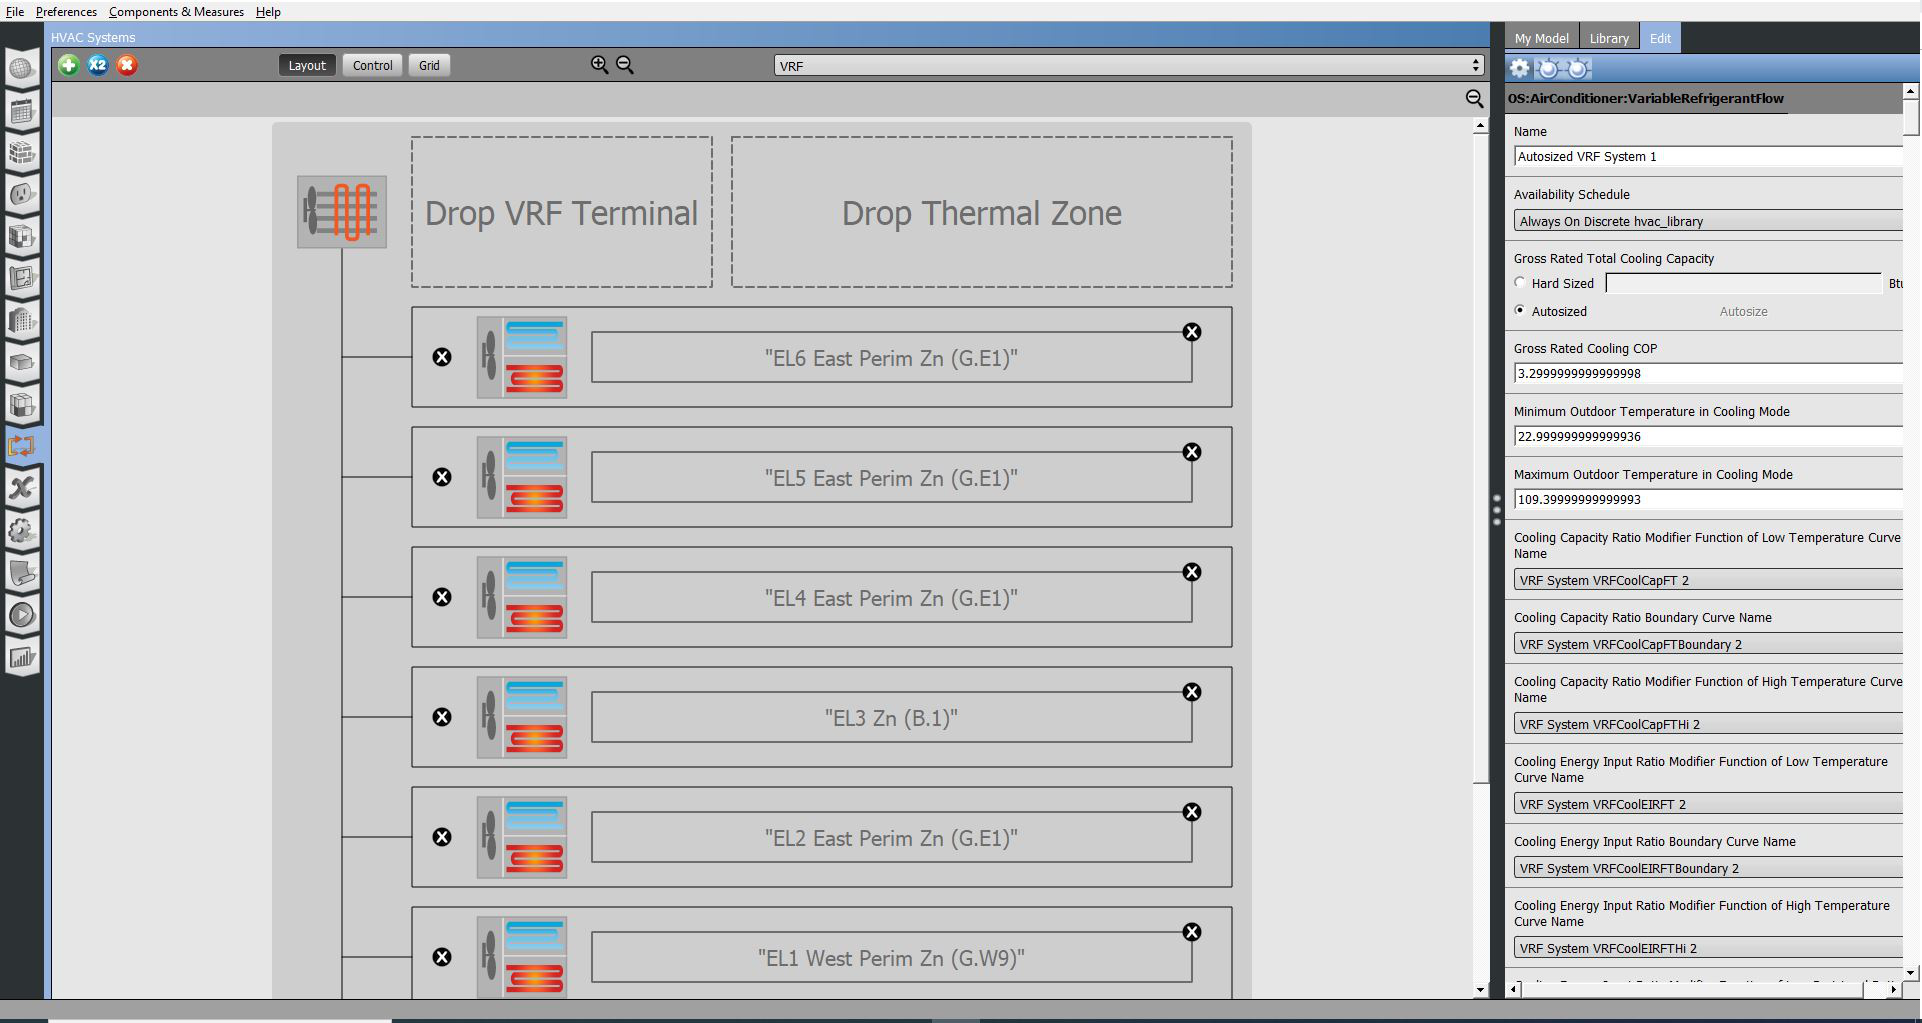
"Edit" allows you to select certain Components and edit the settings for that Component. It is used in the HVAC Systemstab to edit component settings, assign thermal zones to loops, and to add plenums.
Above: Edit settings on some objects in the right panel Edit tab.
Left Panel Bottom
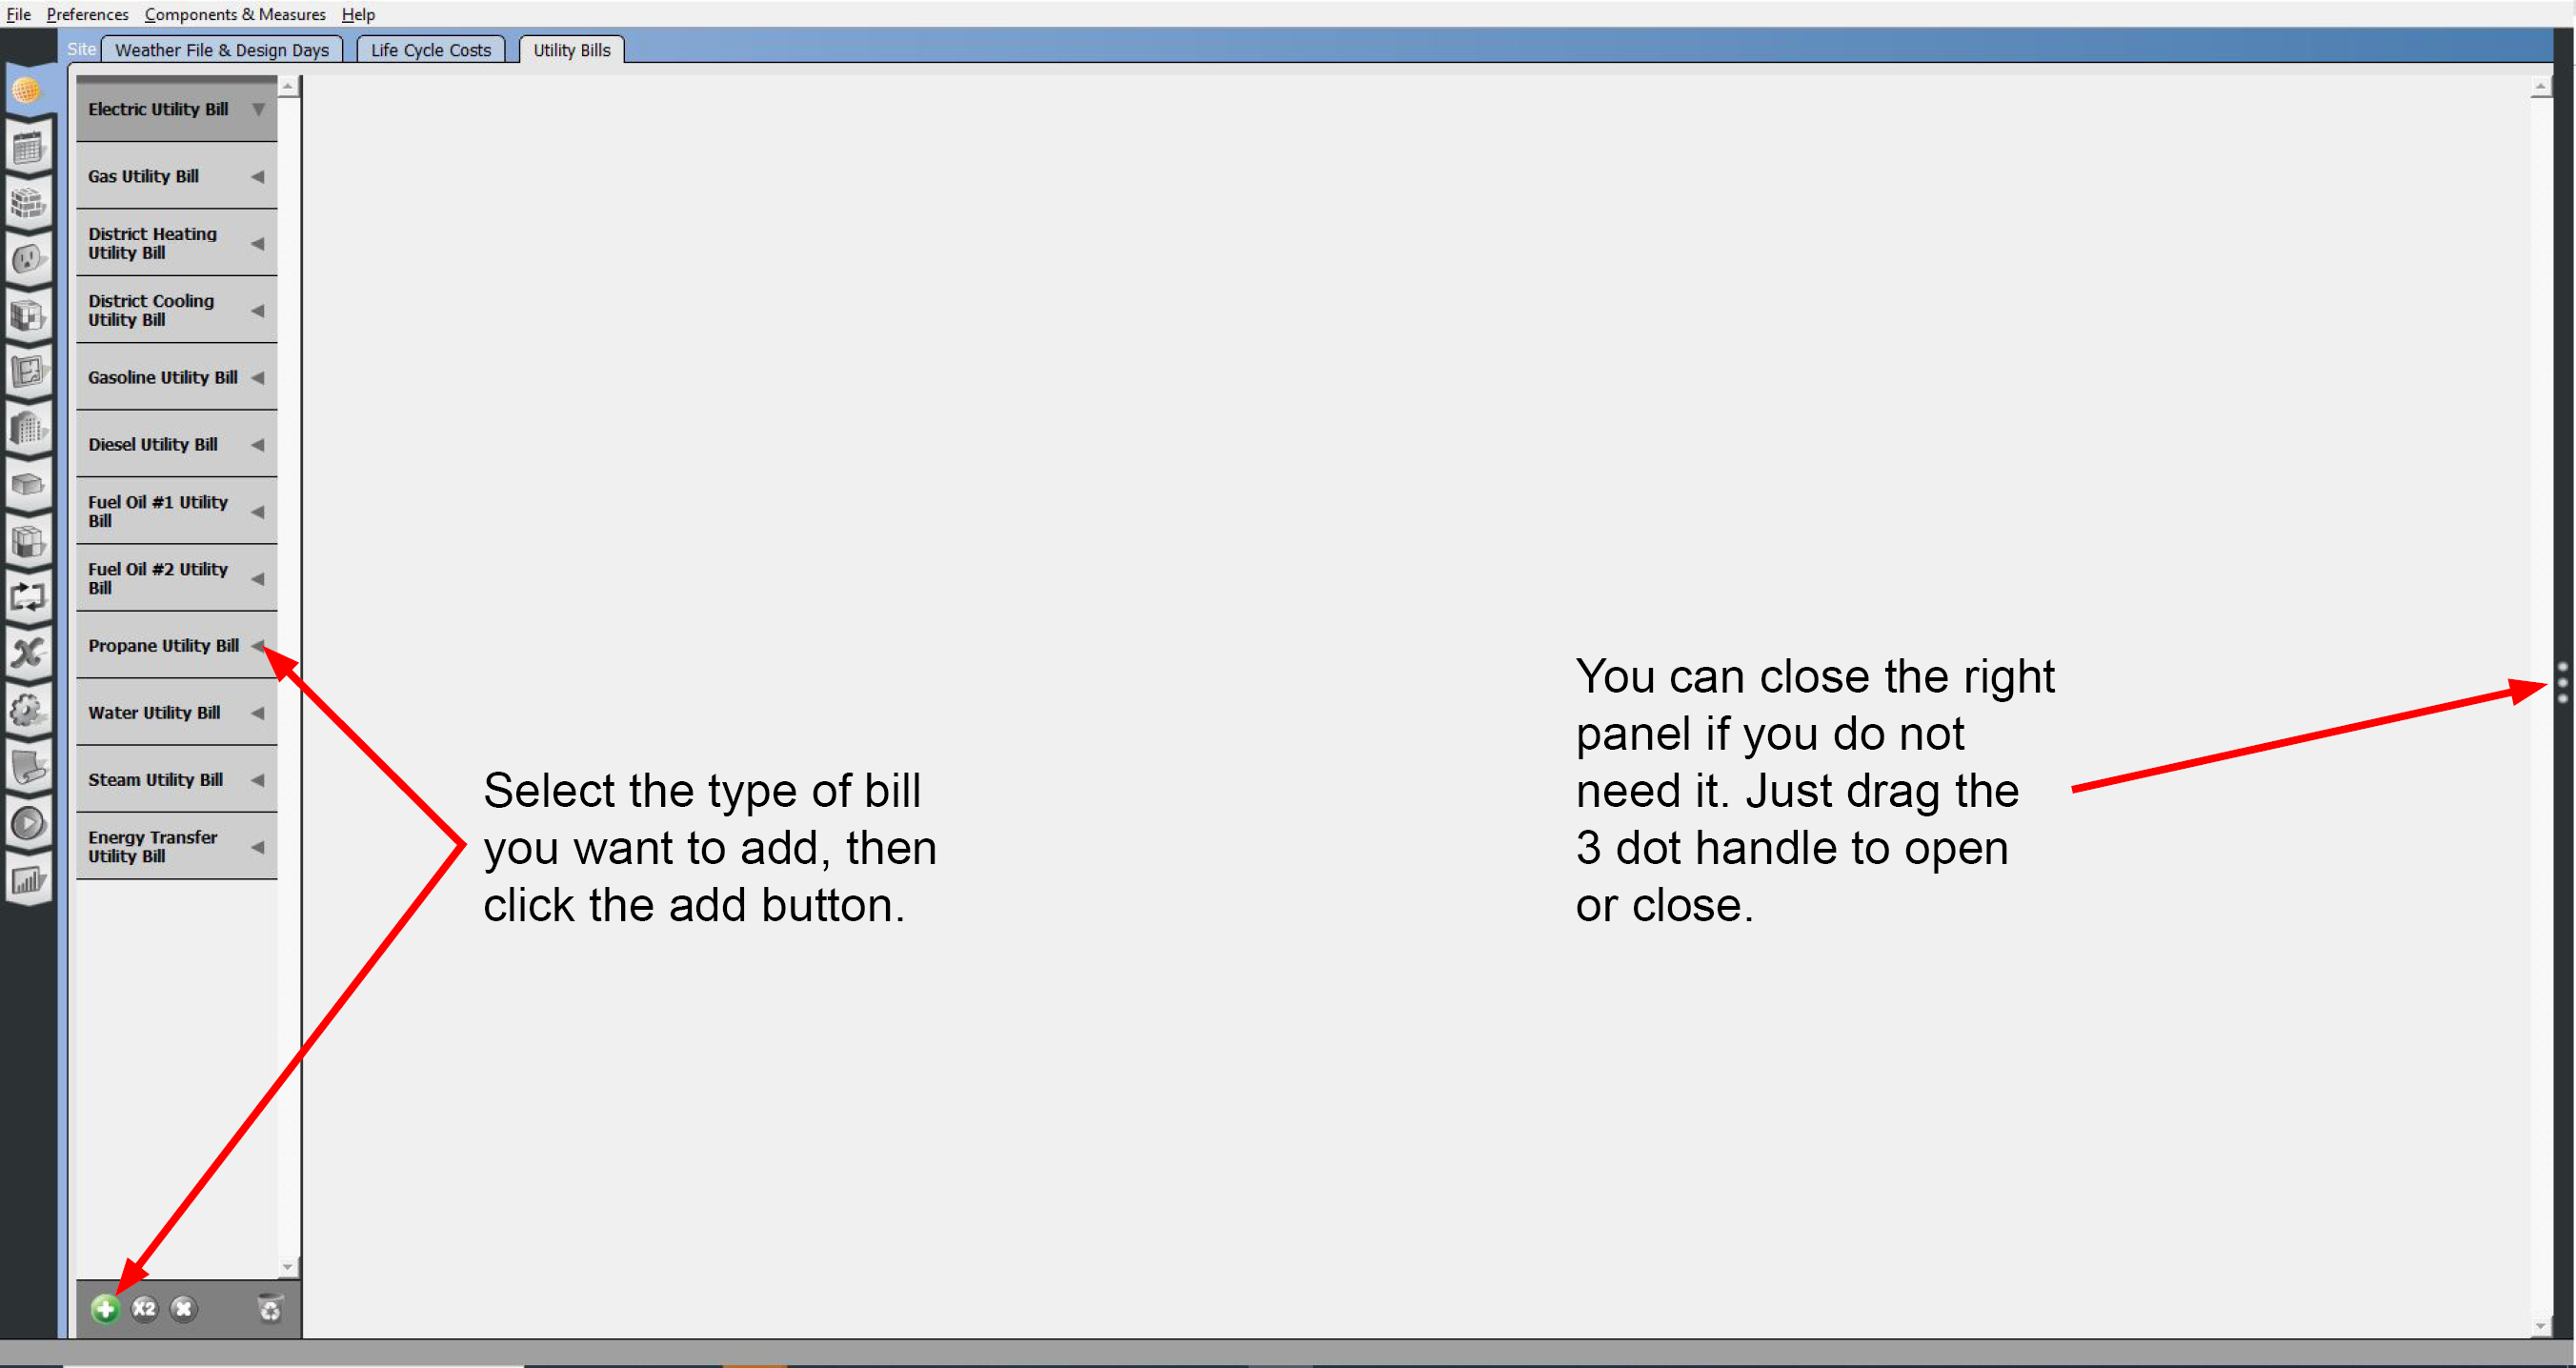
 Add New Item allows the user to add a new Component to the interface. Sometimes the type of item added depends on the selection in the left panel.
Above: On the Utility Bill sub-tab, select the type of bill you want to add before hitting the Add button.
 Duplicate a selected object with this button.
 Delete a selected object with this button.
 Purge unused objects with this button.
Adding Objects from the Library
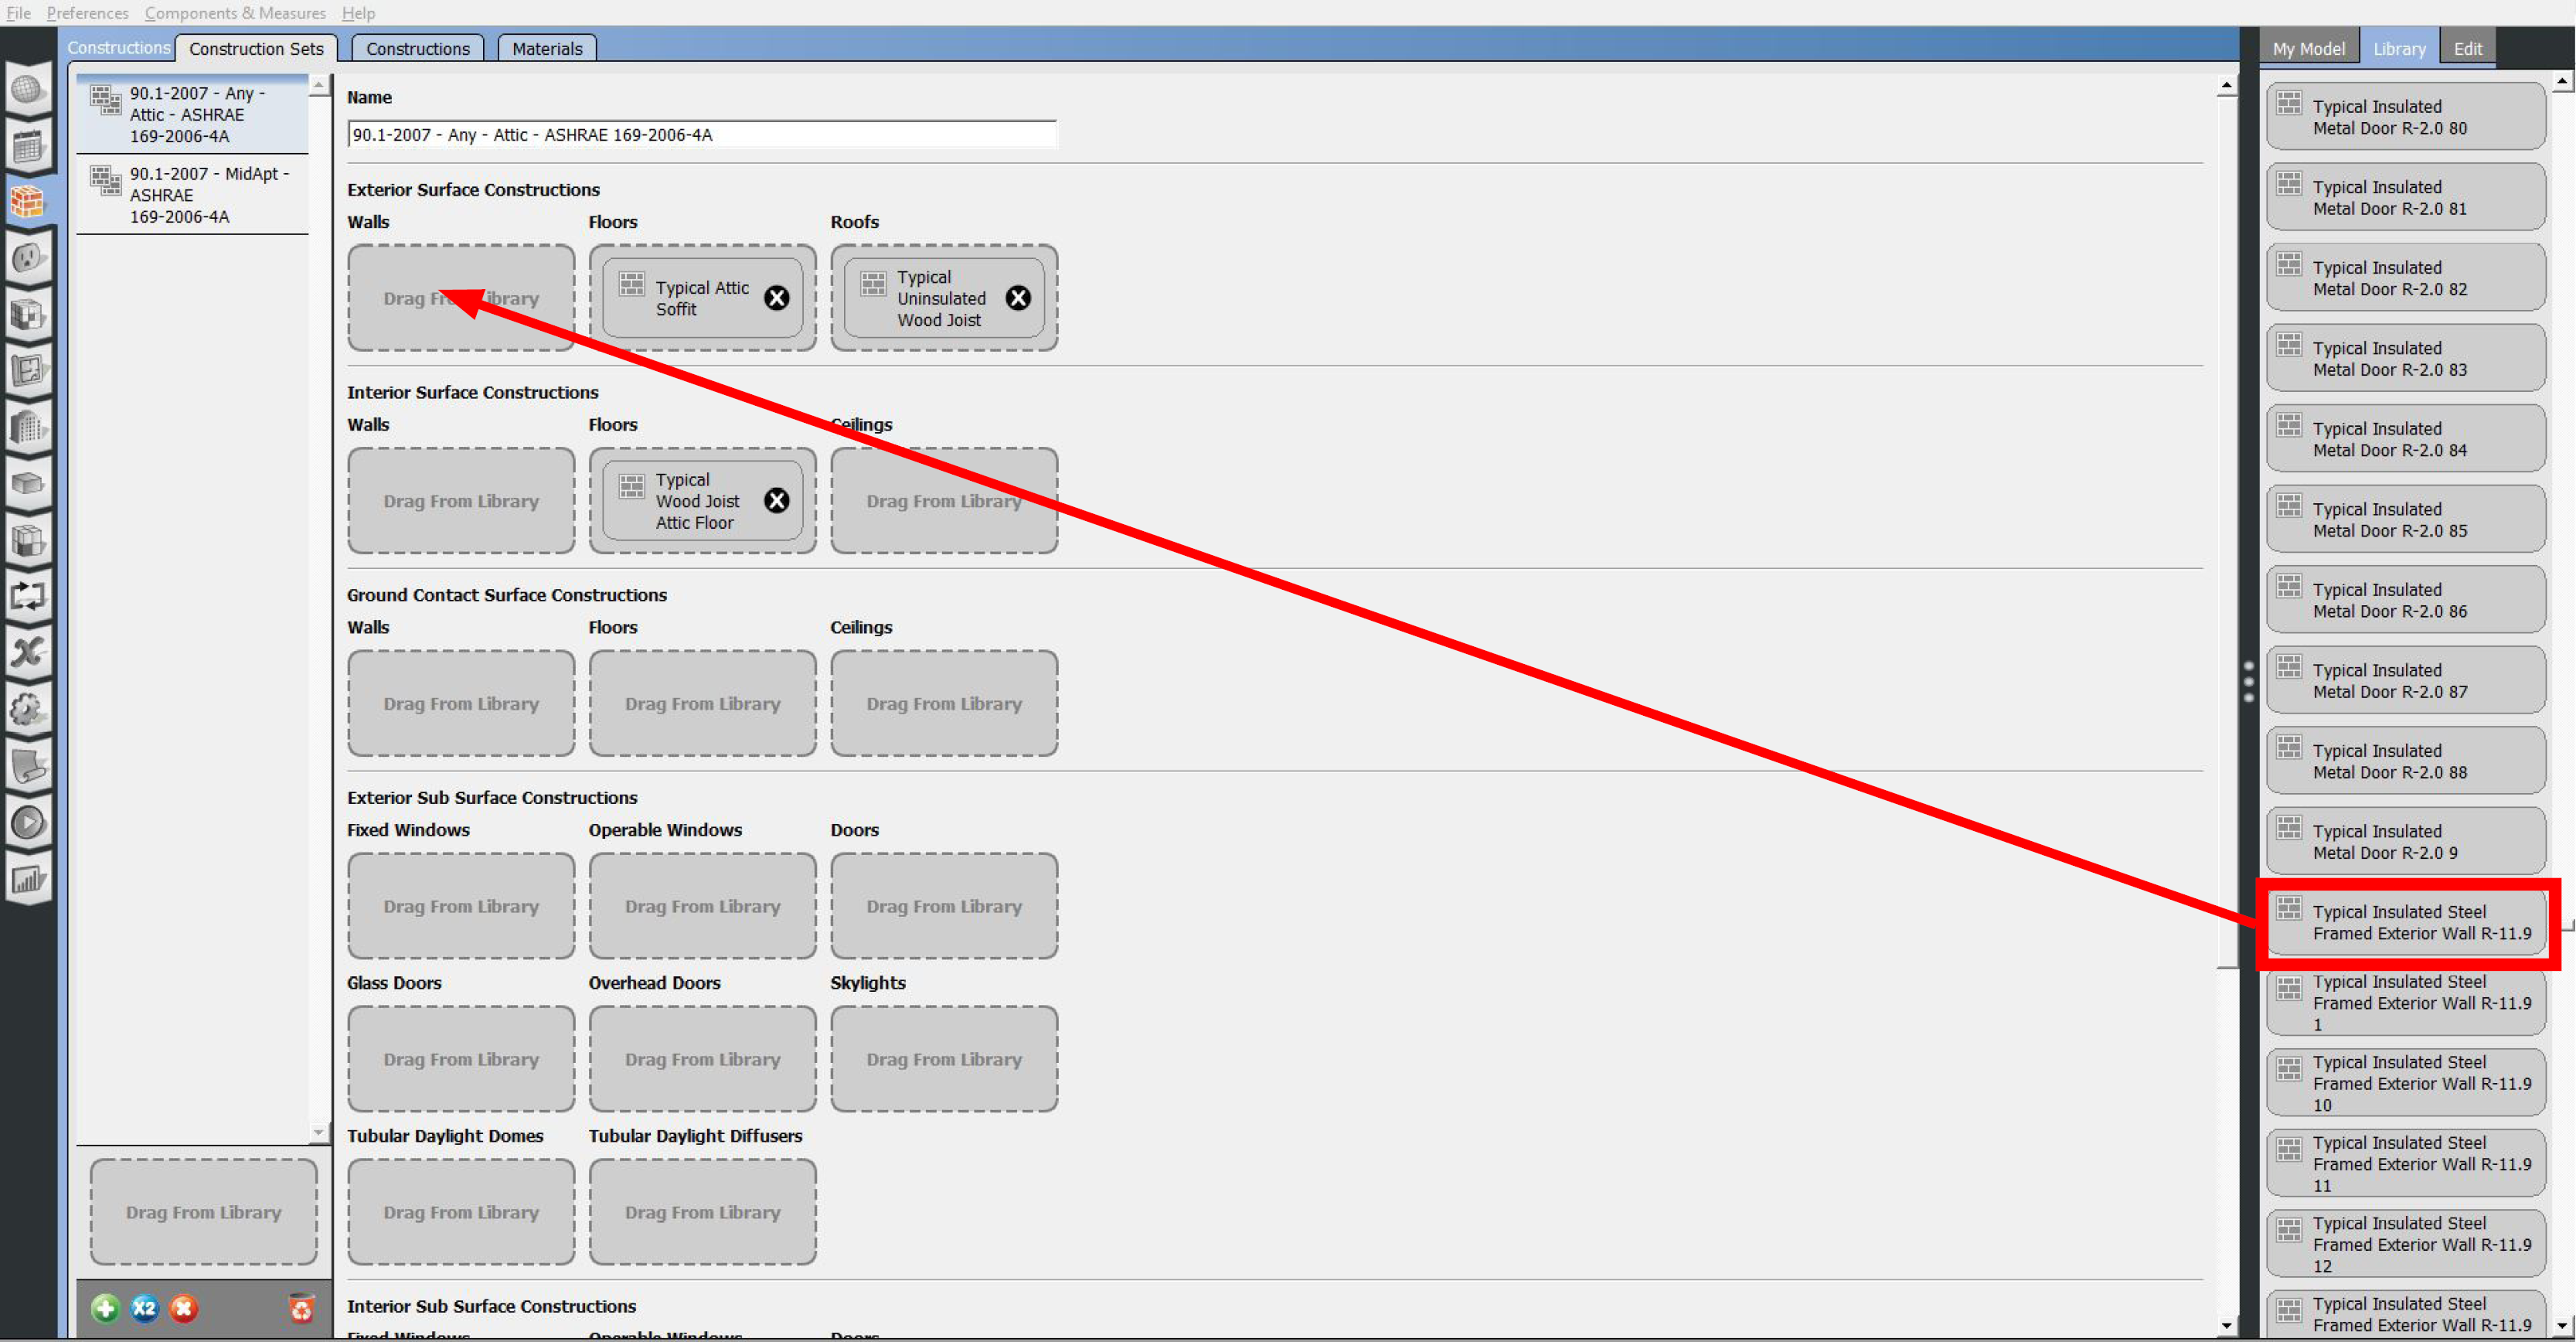
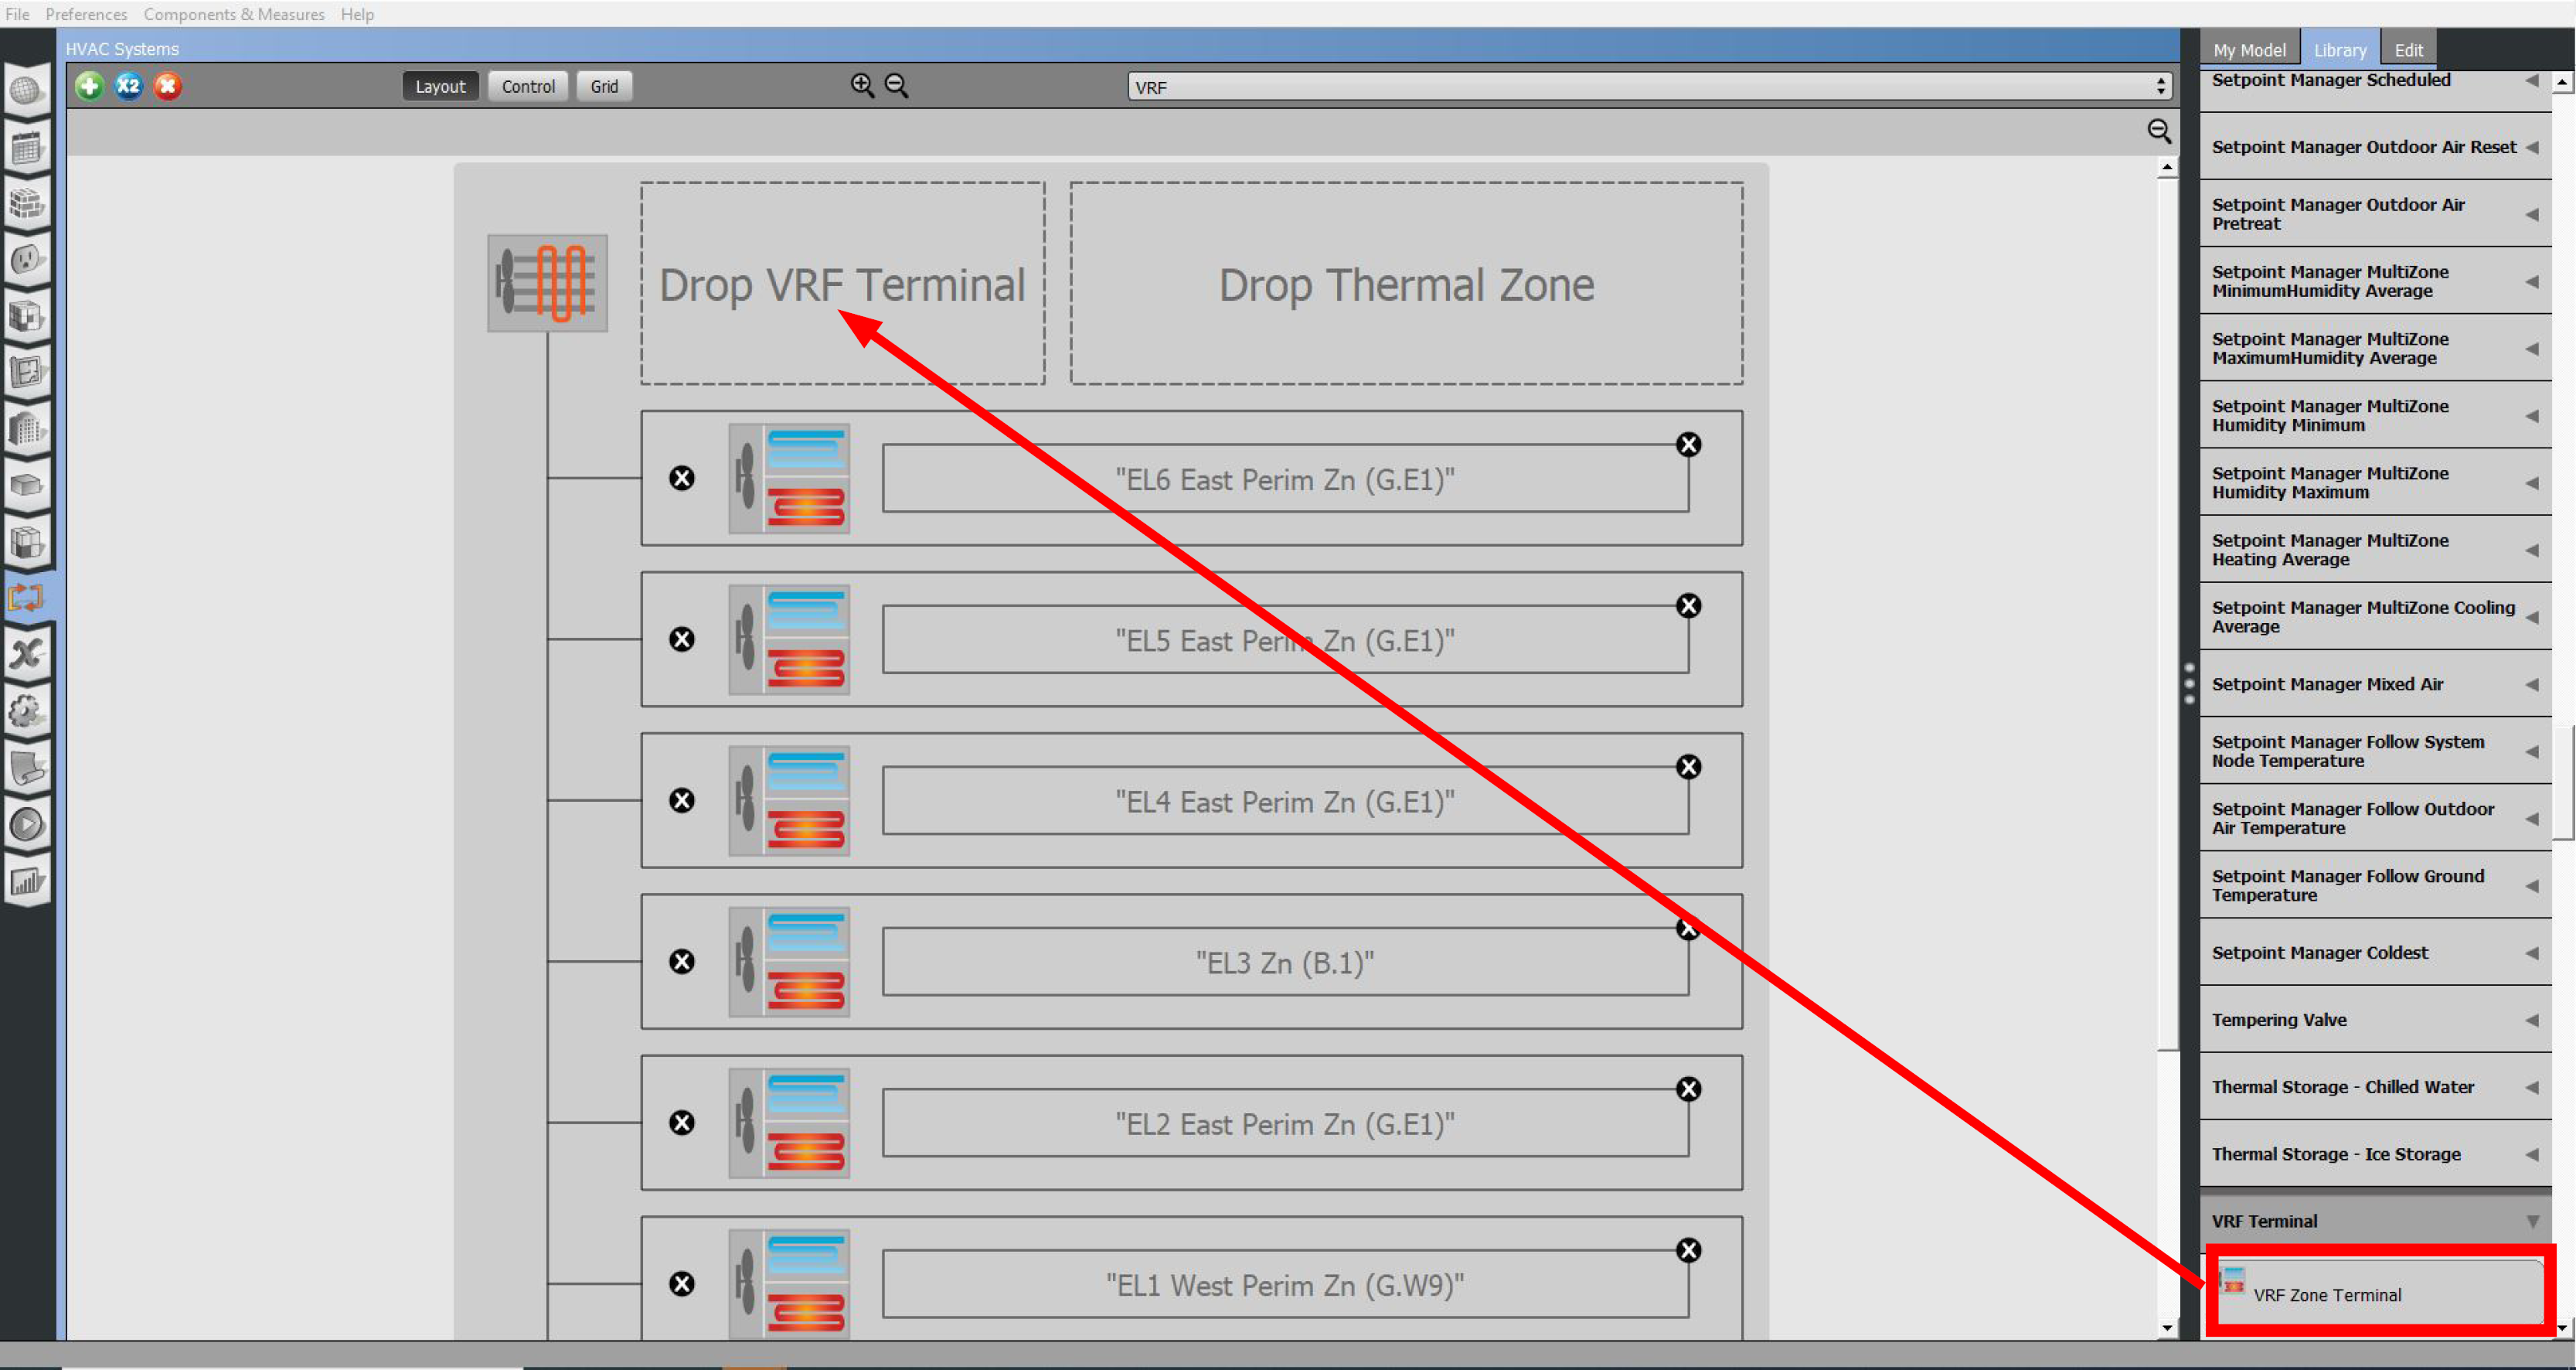
To add items from the library, select the Library tab on the right panel and find the item you want to add to the Model. Select that item and drag and drop it into the correct drop zone. Drop zones are surrounded by a dotted line and are programmed to only accept items that will work for that field.
Above: Drag-and-drop items from the library to the drop zones in the Model.
Above: Drag-and-drop example on the HVAC service hot water.
Grid View and Multi-edit: Thermal Zones, Space Types, and Refrigeration
Earlier releases have included a grid view for the refrigeration section in the HVAC Systems tab. Now you can edit thermal zones and space types in a grid view. This makes it easier to view all your Zones and Space Types at once and compare settings. By selecting the buttons across the top you can select the fields you would like to see and edit.
Above: The grid view provides a spreadsheet style layout. Click on the image to view a larger version.
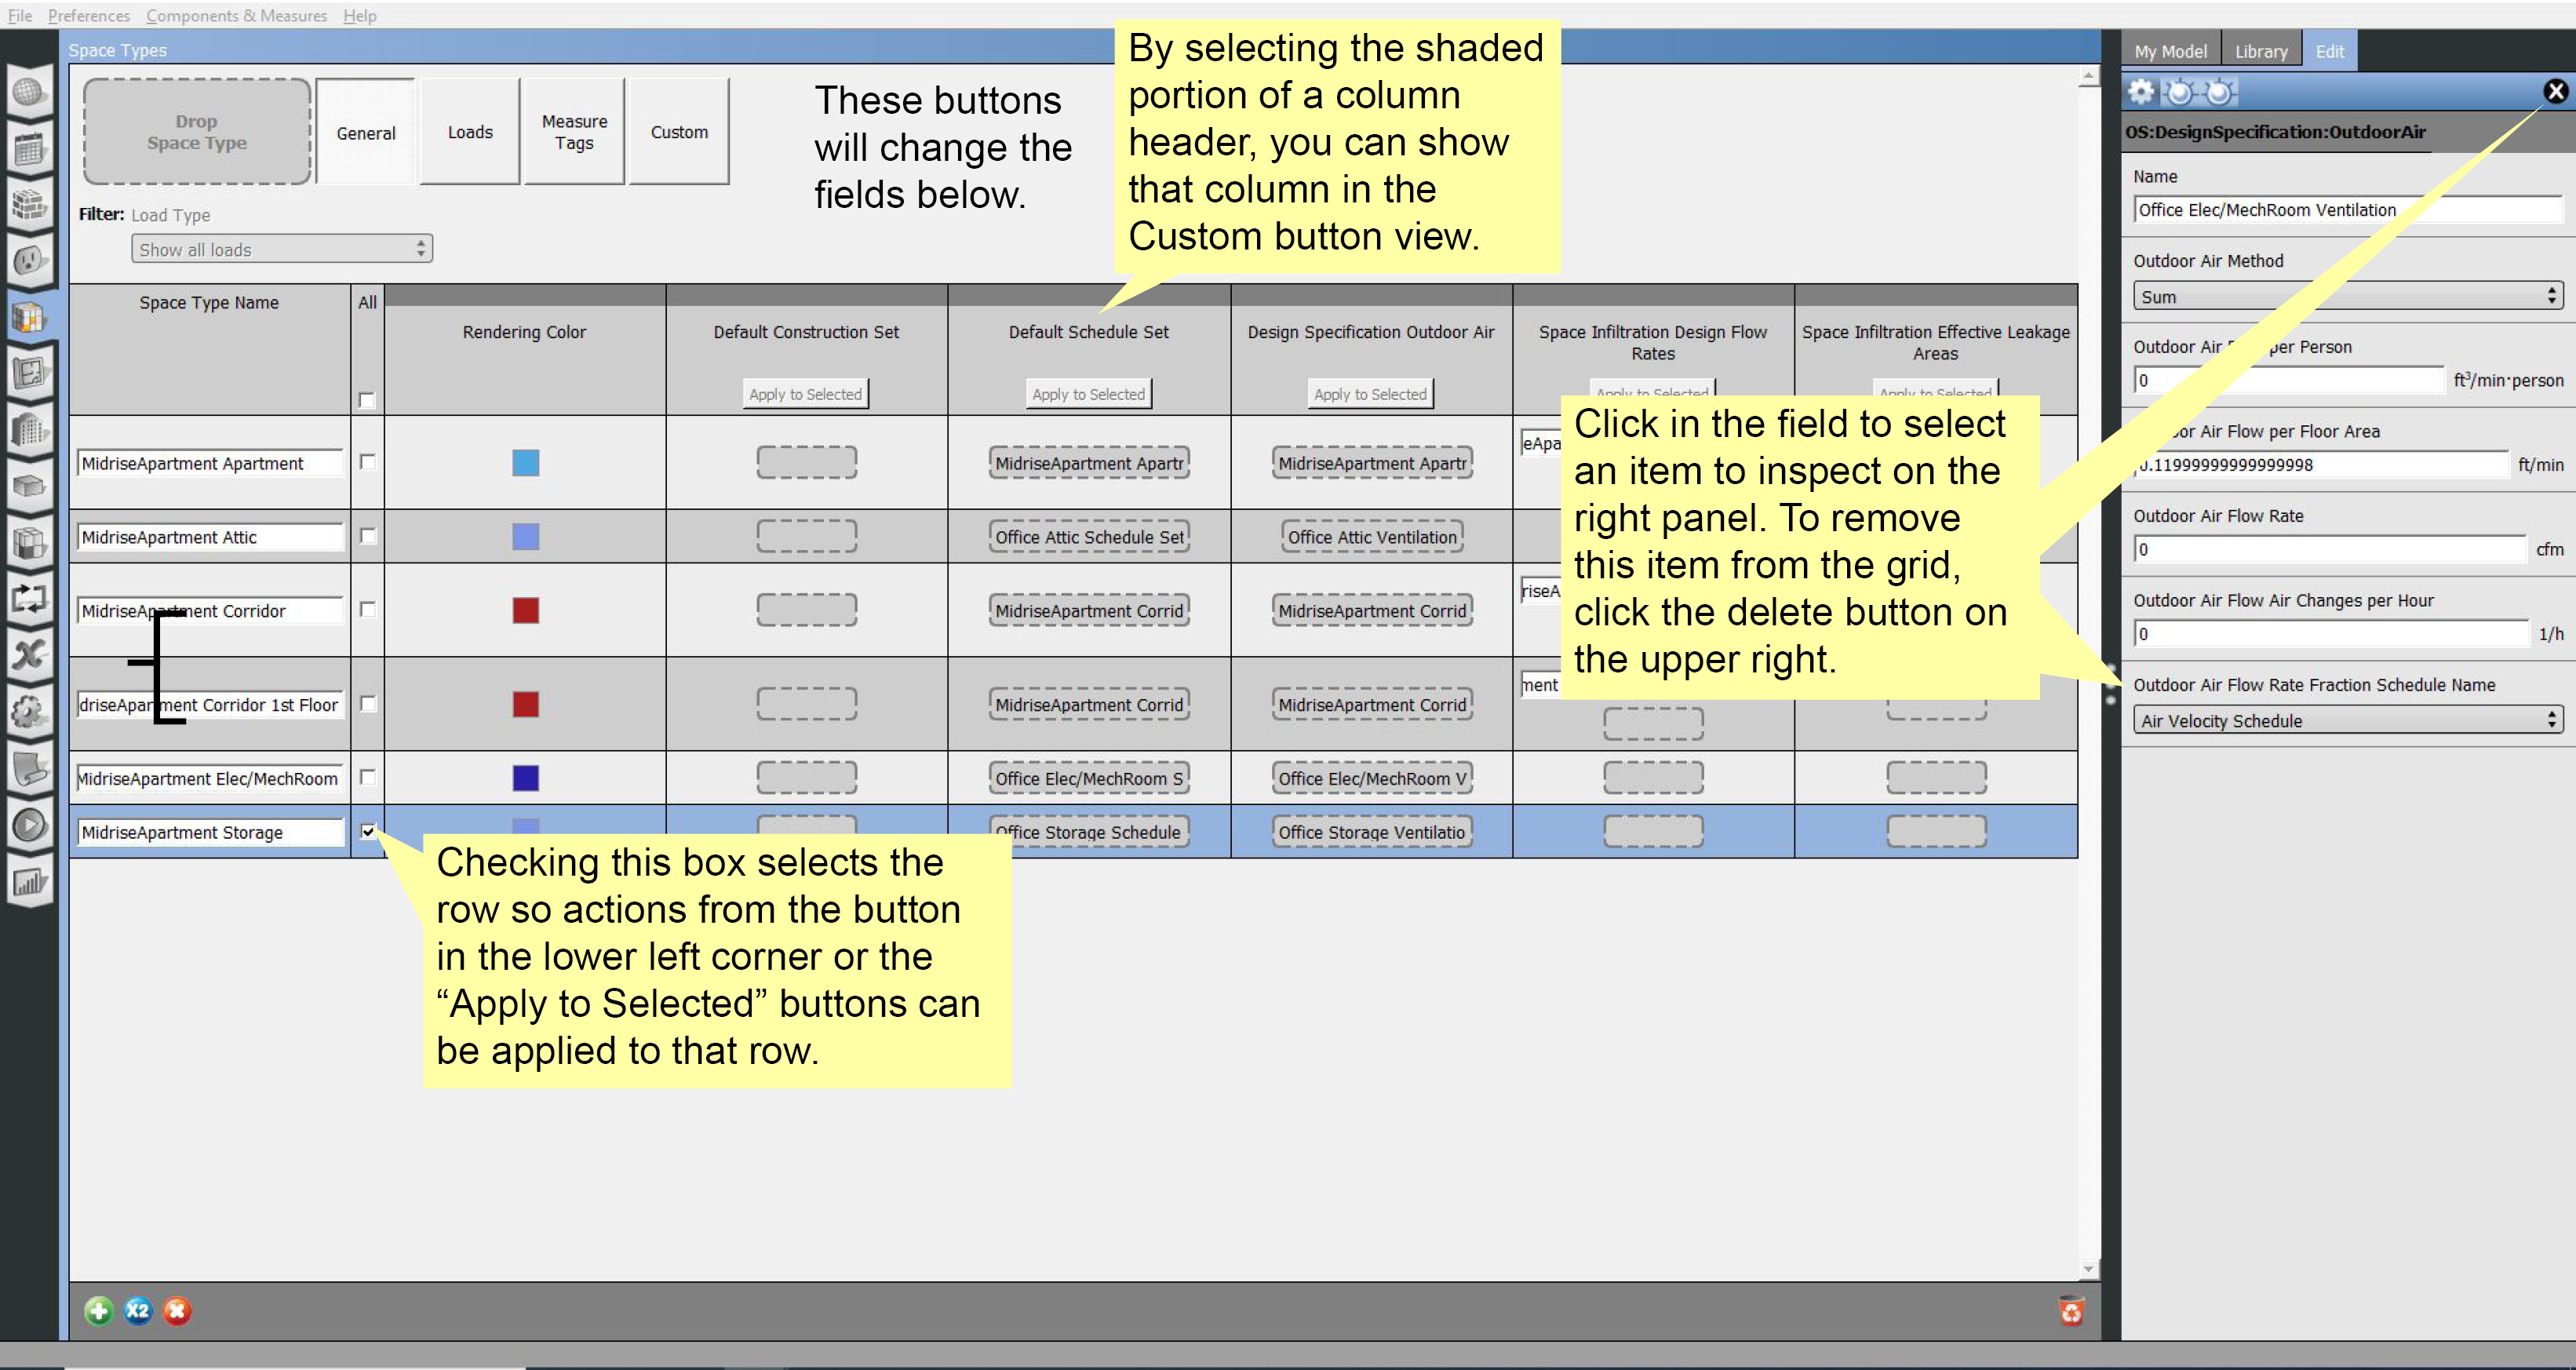
Drag Components and Schedules into the grid view. Most items on the grid can be inspected in the right panel Edit tab, except schedules. To edit or view schedules, go to the Schedules tab.
A yellow highlight indicates the item you have selected in the grid. When you start editing the item in the right panel Edit tab, the highlight will disappear, indicating that the focus is now on editing the item. Use the Delete button in the Edit tab to remove a Component from the grid.
Click the shaded portion of a column header if you want to view that column in the "Custom" category.
Click on the color box on the General button to change the rendering color of the Space Type. This will change the rendering color in the SketchUp Plug-in as well.
You can use the Multi-edit feature on individual columns (as shown below) or on whole rows by selecting a row or rows and hitting the Copy button on the bottom left to duplicate those rows.
Above: The steps for using the multi-edit function are shown above.
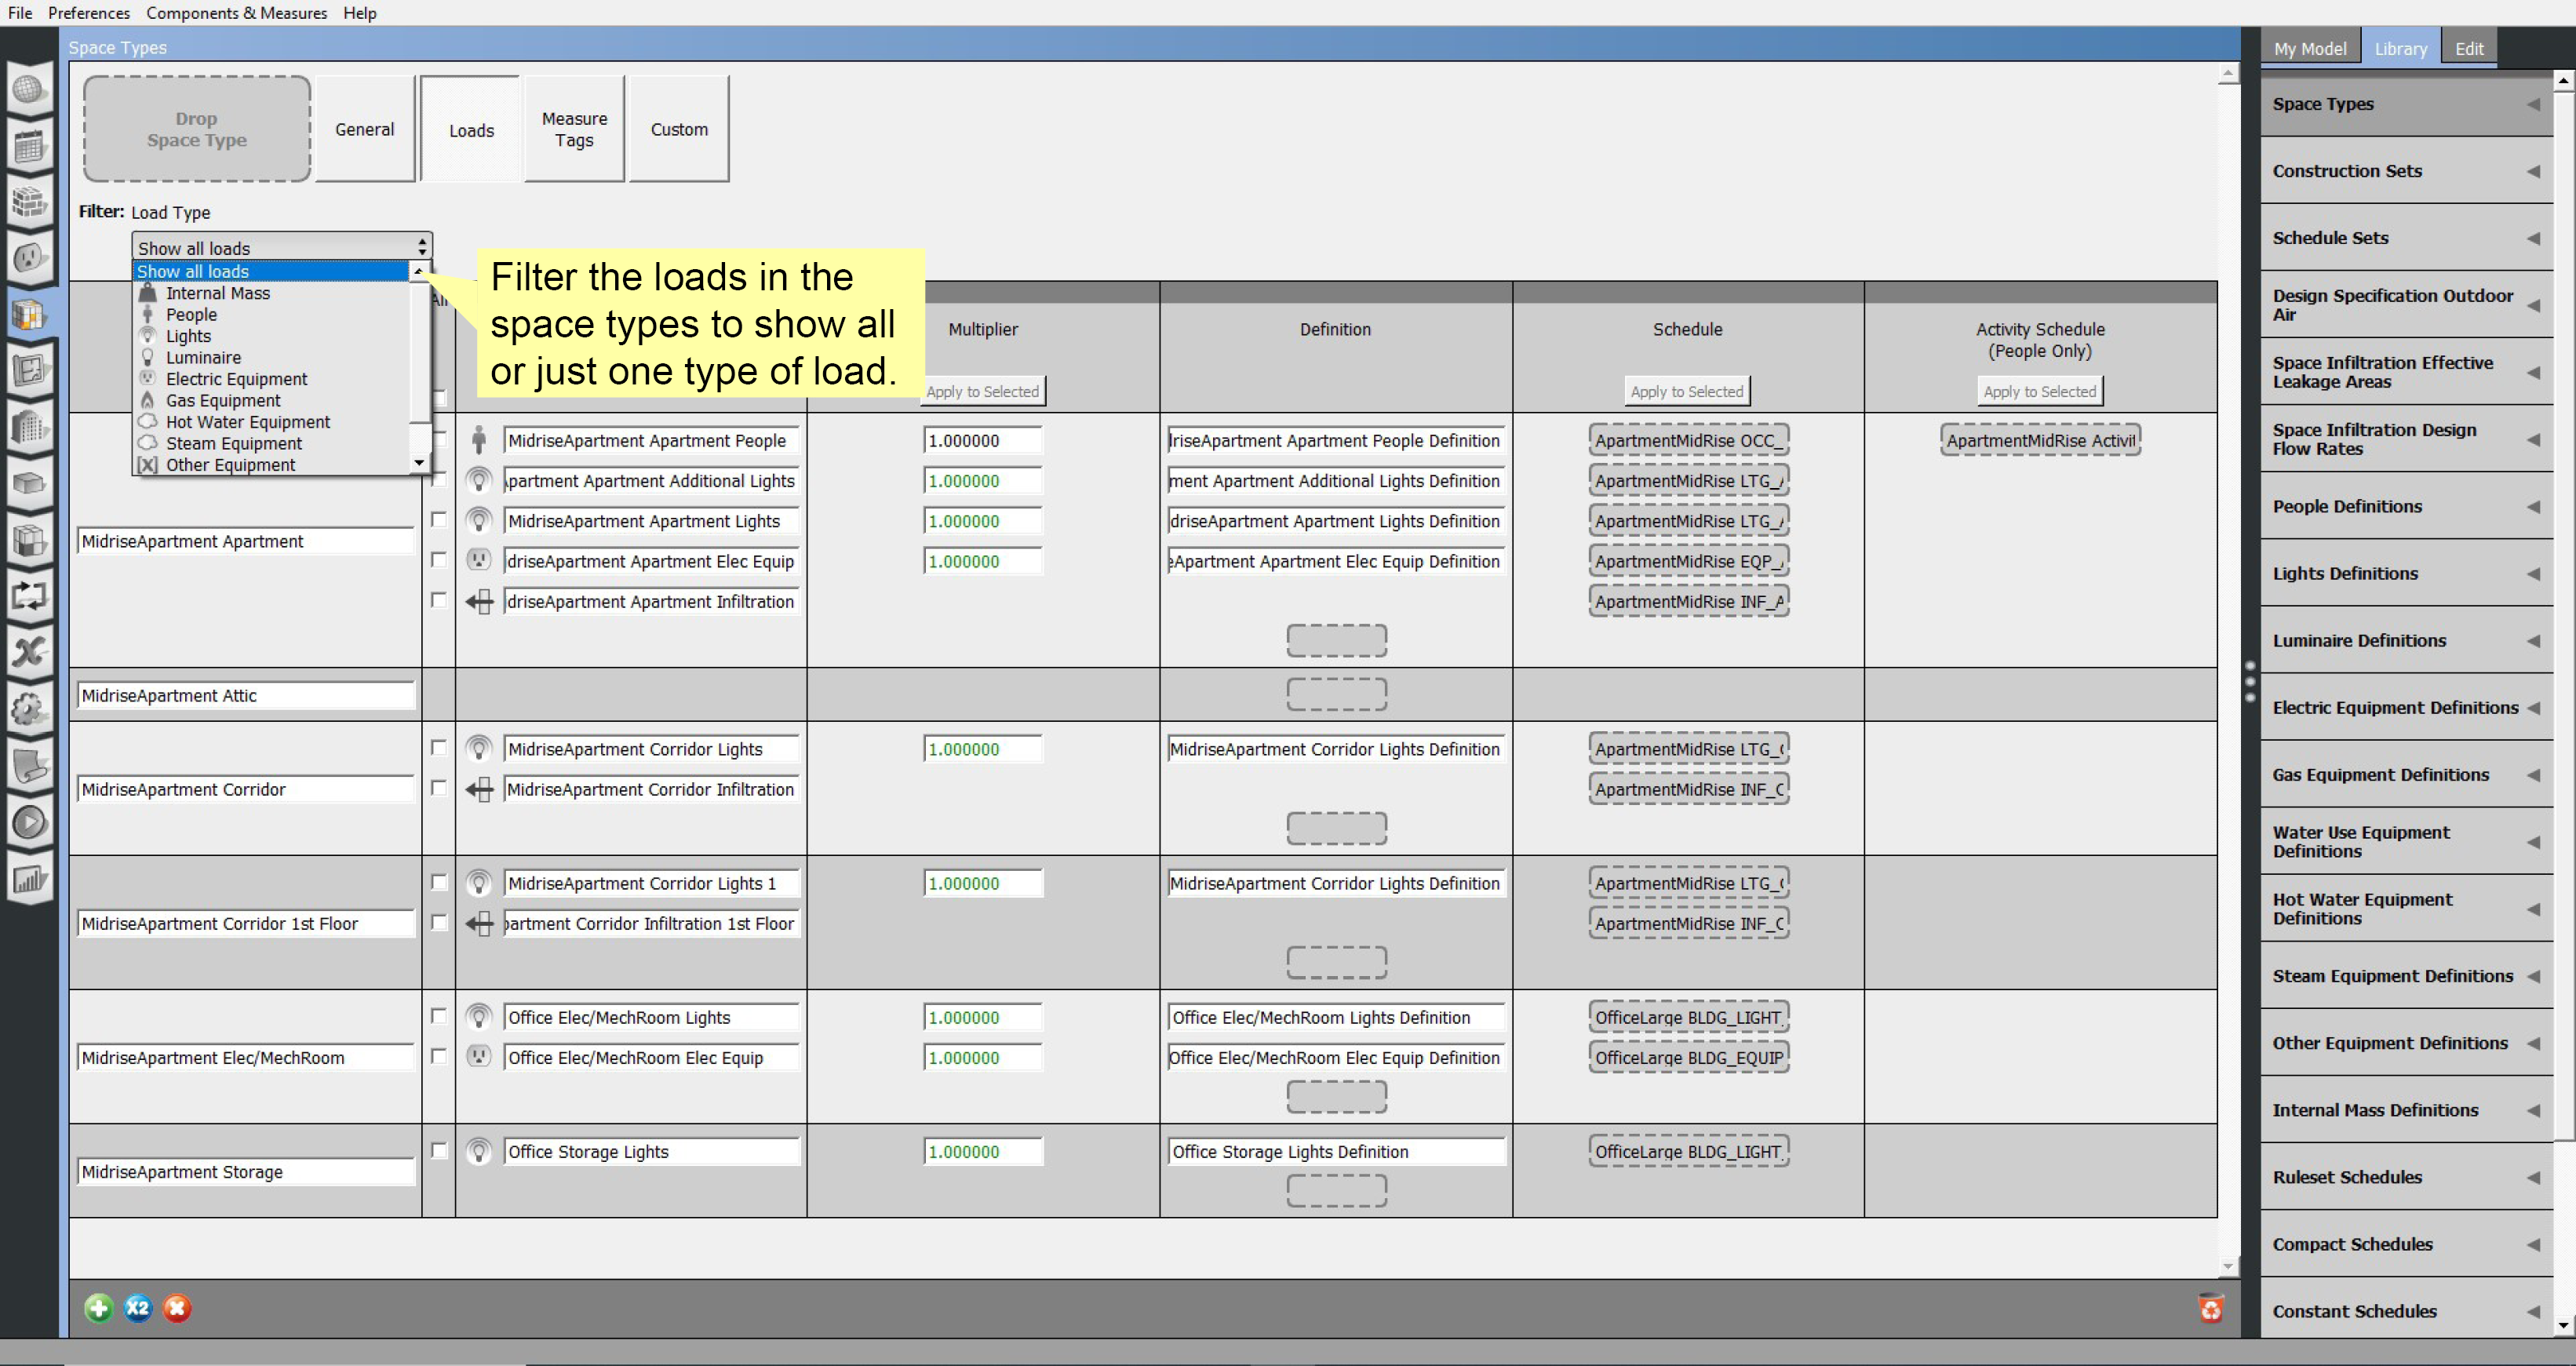
Above: Hit the Loads button to edit and view loads by space type. Click on the name of a component and select the right panel Edit tab to inspect and edit that item.
File Menu
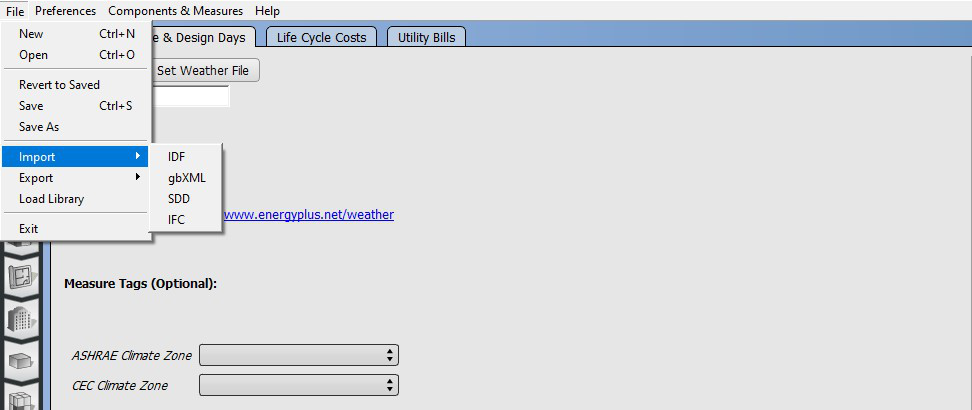
If you launch the OpenStudio Application from the SketchUp Plug-in, your open file will automatically open in the application. To save a file or open a new file from within the OpenStudio Application, access the corresponding options within the File menu.
When you save an OpenStudio Model (OSM) in the OpenStudio Application or the SketchUp Plug-in, a folder is saved next to the OSM file. This folder contains external resources such as the weather file, scripts, and simulation results.
Load Library is also a very important feature. This allows you to load building component libraries for specific building types. These libraries are the same as those used in the SketchUp Plug-in templates.
Above: The File menu contains the new, open, revert, save, import, and export functions.
Preferences Menu
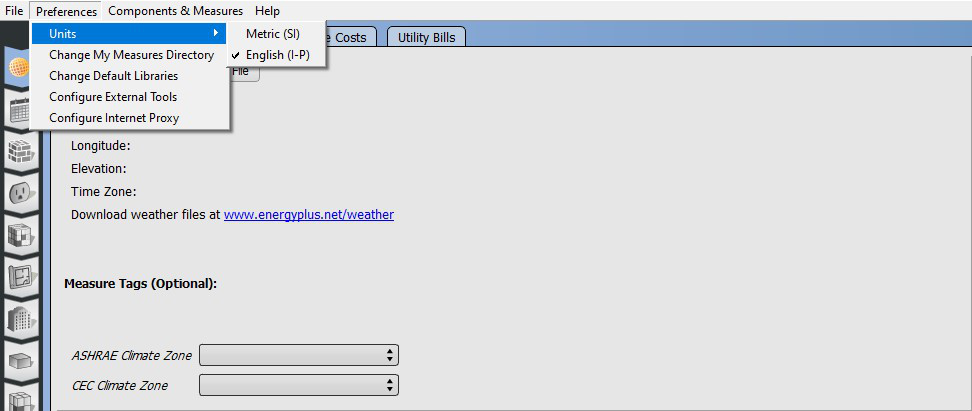
The Units menu lets you switch between SI and IP units. This affects both input fields and output data on the Results Summary tab. It does not currently affect standard EnergyPlus output files.
The SketchUp Plug-in has access to this as well under Extensions->OpenStudio->Preferences.
"Change Default Libraries" allows one to restore default libraries. This feature complements the Load Library feature within the File menu. Loading several libraries could increase the duration to boot the OpenStudio Application. To reduce this duration, restore default libraries.
Above: The Preferences menu contains the units, measure directory, and tool location options.
Components & Measures Menu
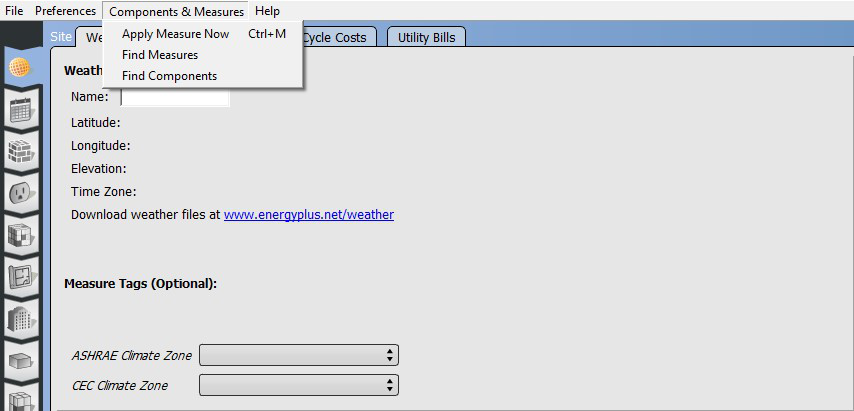
Above: The Components & Measures menu contains the Apply Measure Now, Find Measures, and Find Components features
Apply Measures Now
You can apply measures to your Model at any time by going to the Components and Measures menu and selecting the Apply Measures Now option.
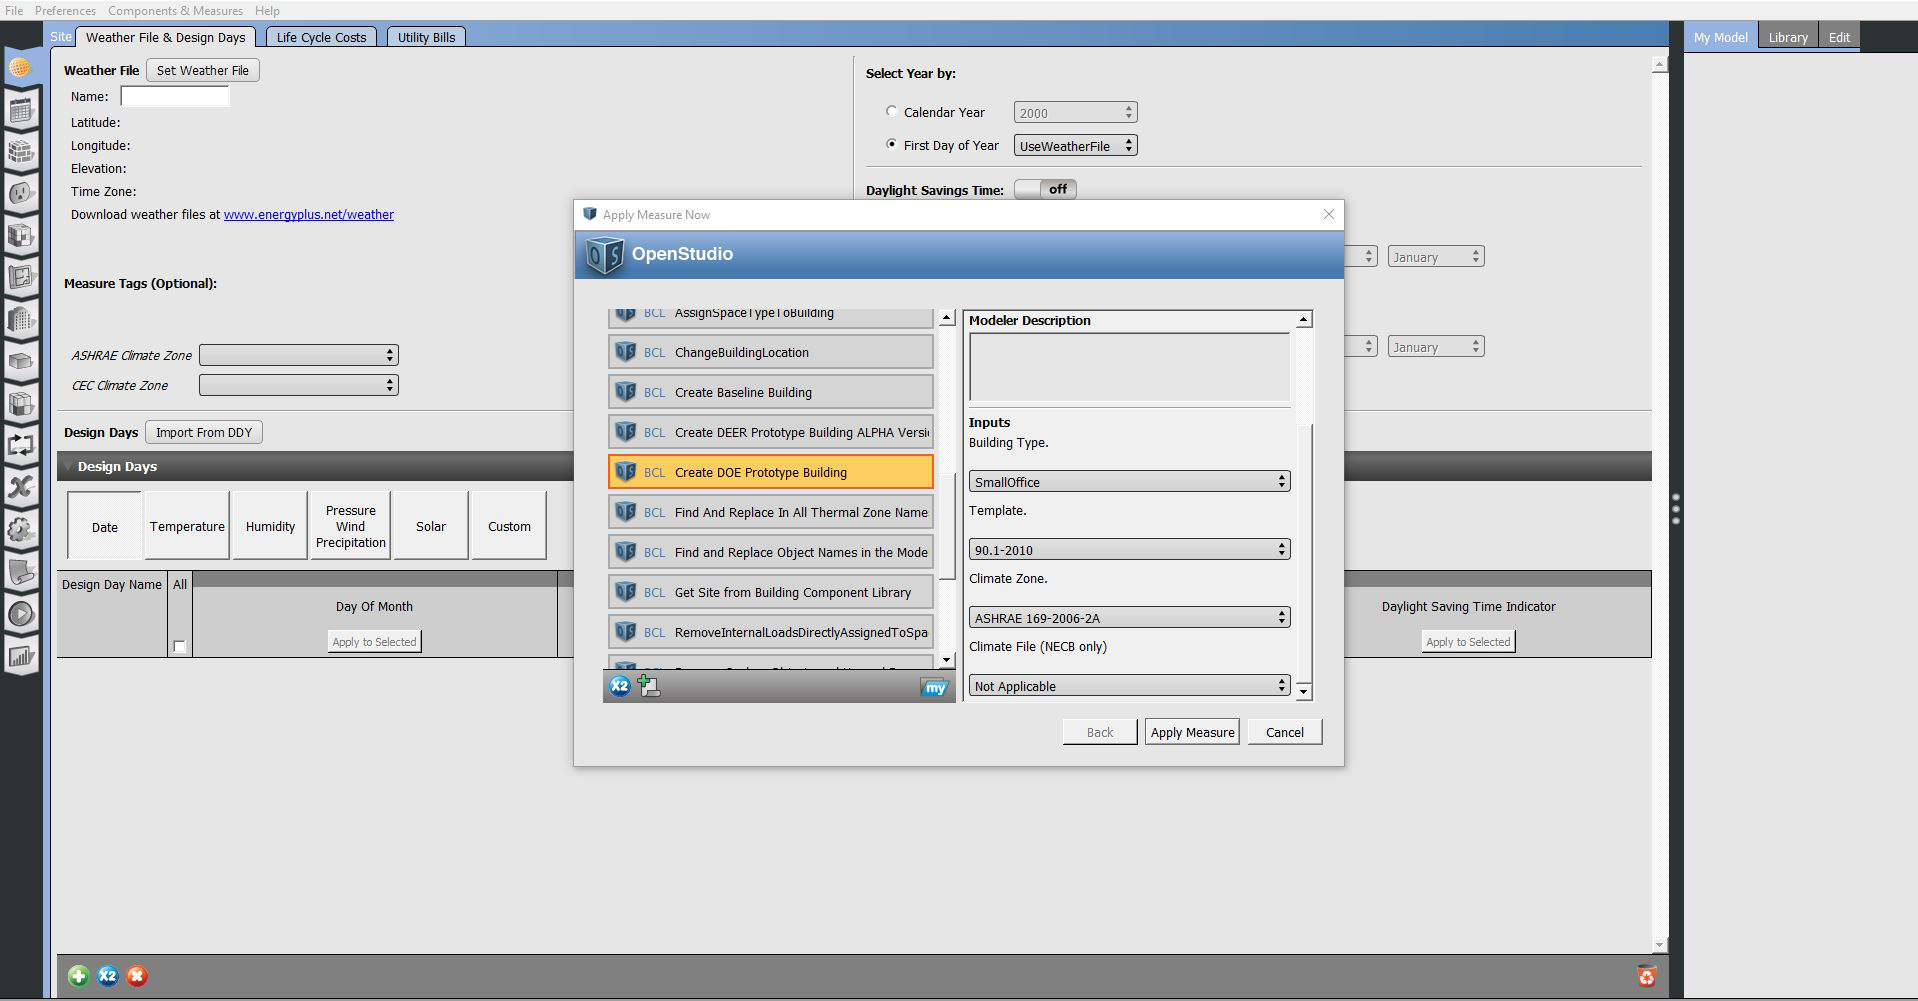
This will open a dialog that allows you to choose a measure (downloaded from the BCL) to apply, or even write your own measure and test it.
Once you select a measure you may edit the measure inputs on the right side of the dialog. Click "Apply Measure" to start.
Above: This menu item allows you to run one measure on your model.
Find Measures and Find Components
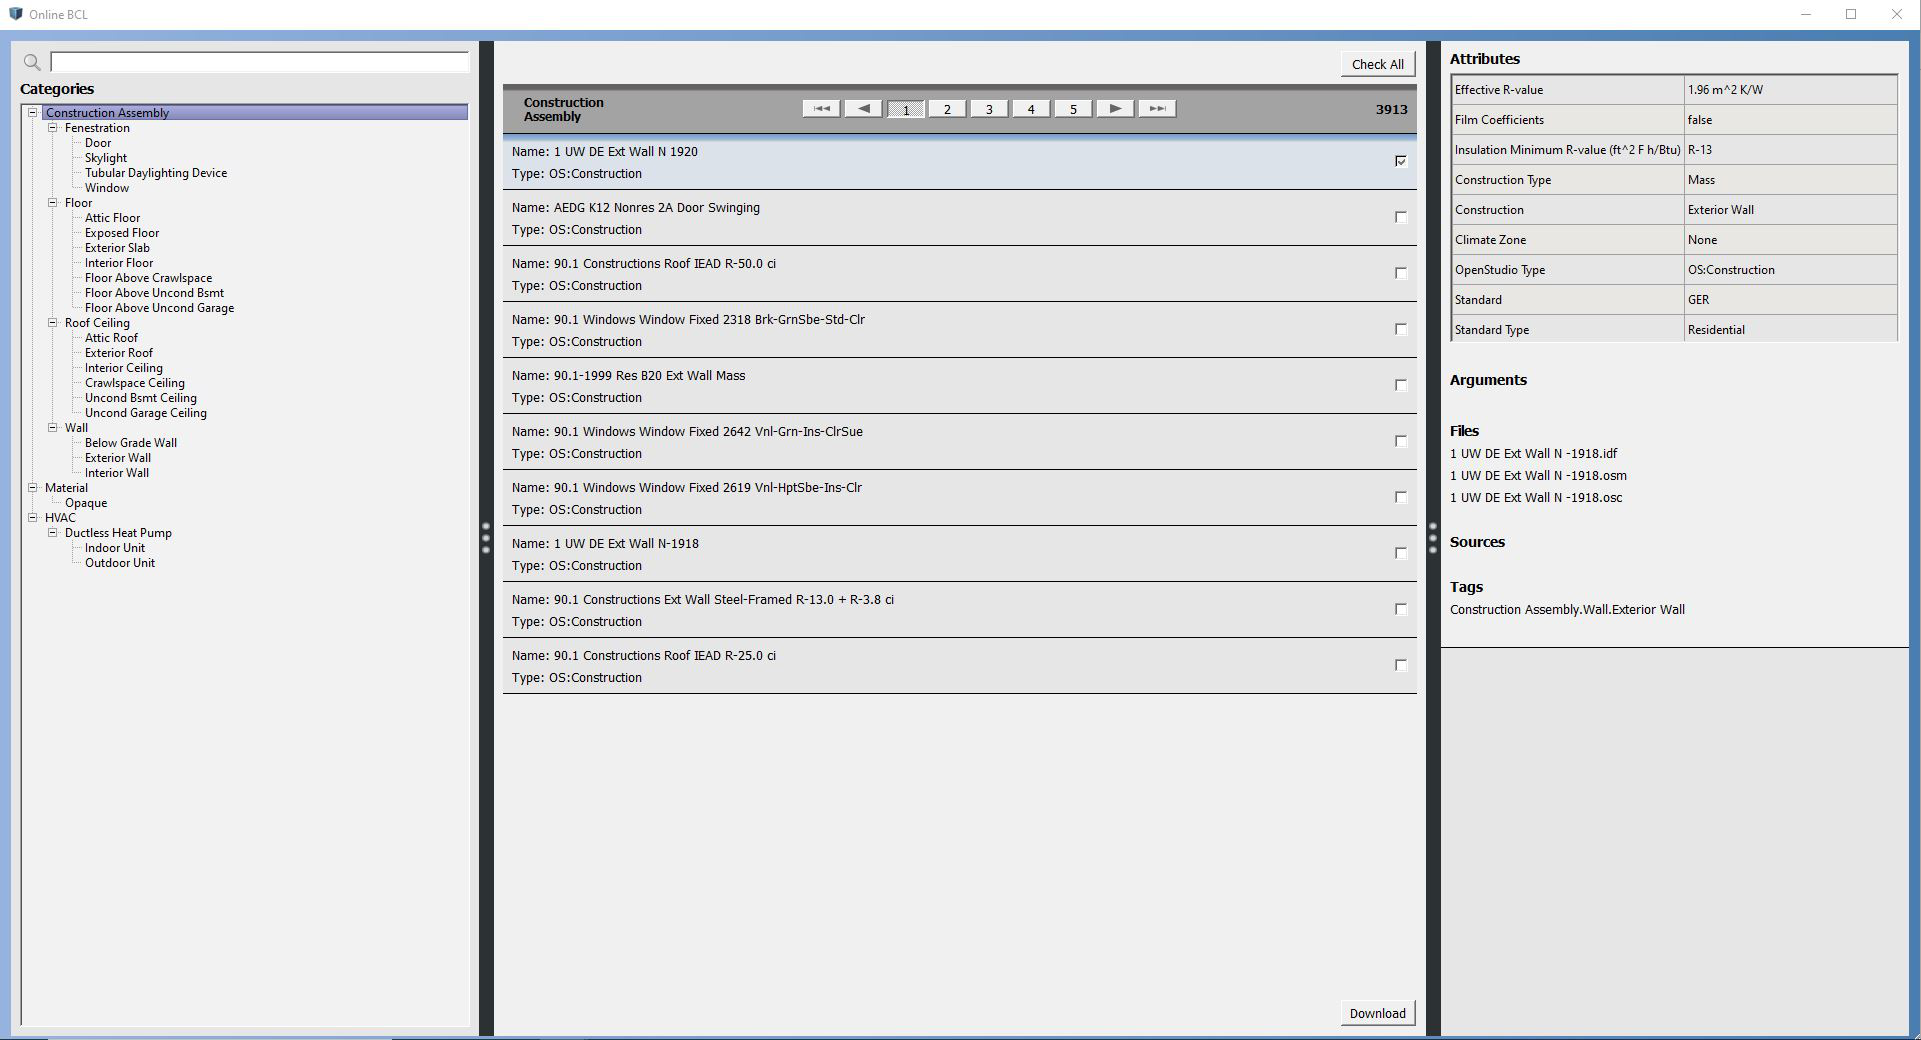
The Online BCL window gives you access to an online repository of building energy modeling data called the Building Component Library. Although you can access the BCL website on its own, OpenStudio Application has integrated access to the BCL. You can access this through the Components & Measures menu.
Above: This window gives you access to the online BCL to download measures or components.
Environment Variables
A variety of environment variables can be used to modify the OpenStudio Application's operation. Environment variables can be set on the command line for a specific session or stored permanently in the advanced system settings on Windows or in your profile file (eg ~/.bashrc) on Unix.
OpenStudio Application Environment Variables
OPENSTUDIO_APPLICATION_DEBUG, if set then debug level logging is enabledOPENSTUDIO_APPLICATION_LOGFILE_PATH, if set to a path then logging information is sent to the file pathOPENSTUDIO_APPLICATION_SLEEP_AT_START, if set to an integer the application sleeps that many seconds before starting to allow a debugger to attachOPENSTUDIO_APPLICATION_START_TAB_INDEX, if set to an integer the application opens the specified tab first (enum VerticalTabID in OSDocument.hpp) { SITE = 0, SCHEDULES = 1, CONSTRUCTIONS = 2, LOADS = 3, SPACE_TYPES = 4, GEOMETRY = 5, FACILITY = 6, SPACES = 7, THERMAL_ZONES = 8, HVAC_SYSTEMS = 9, OUTPUT_VARIABLES = 10, SIMULATION_SETTINGS = 11, RUBY_SCRIPTS = 12, RUN_SIMULATION = 13, RESULTS_SUMMARY = 14 }
Qt Environment Variables
Qt Environment Variables are described in the Qt documentation.
QT_AUTO_SCREEN_SCALE_FACTORQT_DEVICE_PIXEL_RATIOQT_SCALE_FACTORQT_SCREEN_SCALE_FACTORSQTWEBENGINE_CHROMIUM_FLAGSQTWEBENGINEPROCESS_PATHQTWEBENGINE_REMOTE_DEBUGGING

